
Glassing For High Country Mule Deer: Proven Tactics to Locate More Bucks
"Let your glass do the walking."
- Eastman's Hunting Journal
When you're chasing mature bucks in big country, glassing isn’t just part of the plan—it is the plan. In the high country, the hunter who masters glassing with purpose, patience, and precision is the one who consistently locates deer. If you want to find more bucks and burn fewer boot miles doing it, here’s how to dial in your high country glassing tactics.
Want to take your scouting game even deeper? Download our free guide, “In the High Country: A Guide to Scouting High Country Mule Deer.” It’s packed with proven e-scouting techniques, terrain analysis tips, and insights on how to recognize big buck country.
Muley Nation was built for hunters who want to be a student of the game—and this guide is where that journey starts.
Why Glassing for Mule Deer in the High Country Matters
High country mule deer hunting isn’t about walking ridgelines all day hoping to bump into a buck. It’s about glassing smart. Observation comes first, movement second. When you let the terrain reveal its secrets, you’ll start to notice travel corridors, bedding zones, and those subtle flicks of movement that most hunters miss. Every hour spent behind quality optics is an investment in understanding mule deer behavior—without blowing them out of the basin.
Best Glassing Spots for High Country Mule Deer
Not all glassing points are created equal. The best vantage points combine elevation, visibility, and concealment. Here are some high-value zones to target:
High Ridges & Knobs: Gaining elevation allows you to glass multiple basins or drainages from one location. A solid glassing knob keeps you above the action without contaminating it with your scent or presence.
North-Facing Slopes: These slopes offer cooler bedding zones where mature bucks often hide during the heat of the day. These are prime glassing targets, especially midday.
Transition Zones: Watch saddles, finger ridges, and travel corridors between bedding and feeding areas. Mule deer use these as highways, especially during first and last light.
Timber Edges & Feeding Zones: Early morning and late evening glassing often reveals bucks staging just inside the edge of cover. Focus on the transition line between thick timber and open feeding areas.
When to Glass for Mule Deer: Timing is Critical
Knowing when to glass can be just as important as knowing where. Mule deer have predictable movement patterns, and your success depends on syncing up with them.
First Light: This is the golden hour. Bucks are on their feet feeding or transitioning to bedding. Be at your glassing point in the dark and start glassing. You will be able to spot deer on a hillside with your binos before you can with the naked eye.
Last Light: As temperatures drop, bucks become active again. Focus on feeding zones and transition lines as deer move from cover to forage. If you want to see big bucks in the evening, glass until it is too dark to see.
Midday: Most hunters overlook this window. Slow, methodical glassing during midday can reveal bedded bucks. Look for subtle signs—an antler tine, an ear flick, or the curve of a back in deep shade.
How to Glass Mule Deer Effectively in Big Country
Be in Position Early: If you’re still hiking in at grey light, you’re already behind. Settle into your glassing location before legal light and let the mountain come alive in front of you.

Start Fast, Finish Slow: In the first 30 minutes of daylight, scan feeding zones for active bucks. Then shift to slow, detailed grid patterns to locate bedded deer.
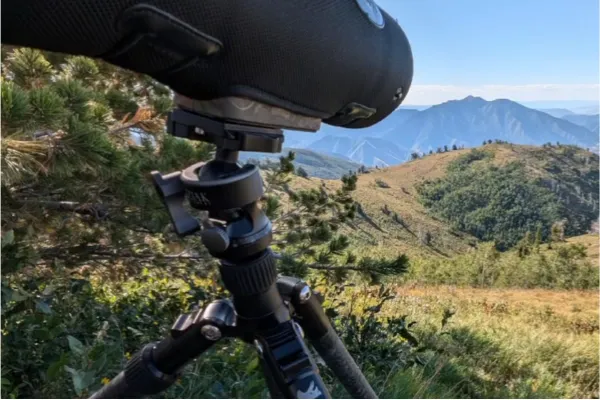
Use a Tripod for Optics: Mounting your binoculars or spotting scope on a tripod drastically improves your ability to detect small, subtle movements. It also reduces fatigue.
Glass Close First: Begin with terrain close to your position before extending your reach. It’s easy to overlook bucks right below you.
Stay Ready: Keep your optics, tripod, and rangefinder easily accessible. Don’t waste time digging through your pack when a buck steps into view.
How Long Should You Stay in One Glassing Spot?
Unless you’re on a known buck, don’t waste several days staring at the same basin. One solid morning and evening session is often enough to assess an area’s potential. If you spot a promising buck, take notes, mark GPS coordinates, and back out. Summer and early fall bucks often stay within tight home ranges—you can return later if needed.
Final Thoughts: Mastering Glassing for High Country Mule Deer
Glassing isn’t about luck—it’s about consistency, discipline, and having a system. The more time you spend behind your glass, the more skilled you become at interpreting terrain, spotting subtle clues, and locating bucks that most hunters walk past.
Want to level up your high country scouting? Download our free High Country Mule Deer Scouting Guide for more in-depth strategies, checklists, and breakdowns to make every glassing session count.
Be a Student of the Game.